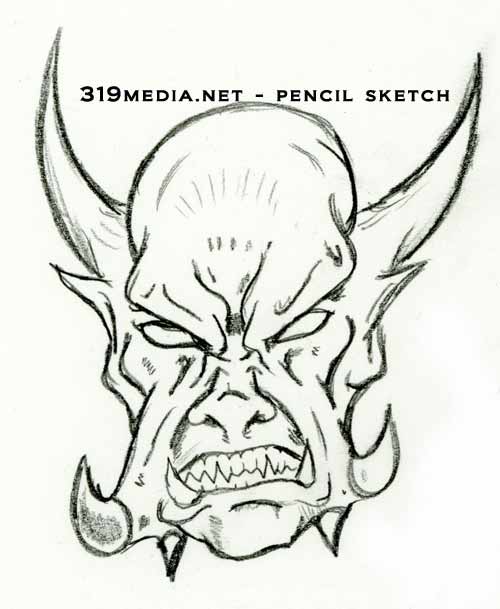
This is the step by step of taking the Monster Face demon tattoo and shirt design from start to finish. The steps had been gone over in the previous post, but here are pictures to accompany it.
Start with a sketch
Originally I had posted that the second step was digital cleanup. But looking through the files it seems more like the original sketch was enlarged, faded slightly, and printed with a B/W laser printer. Then THAT was inked, rescanned, chopped in half, mirrored and cleaned up. Why the printing/re-inking by hand? I feel I have better control doing it that way than with a tablet (which I’m still not 100% comfortable with) or with vector tracing, which introduces its own anomalies.
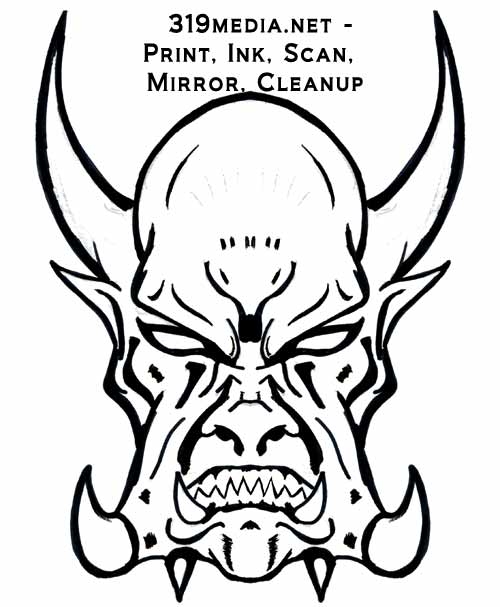
Much more symmetrical
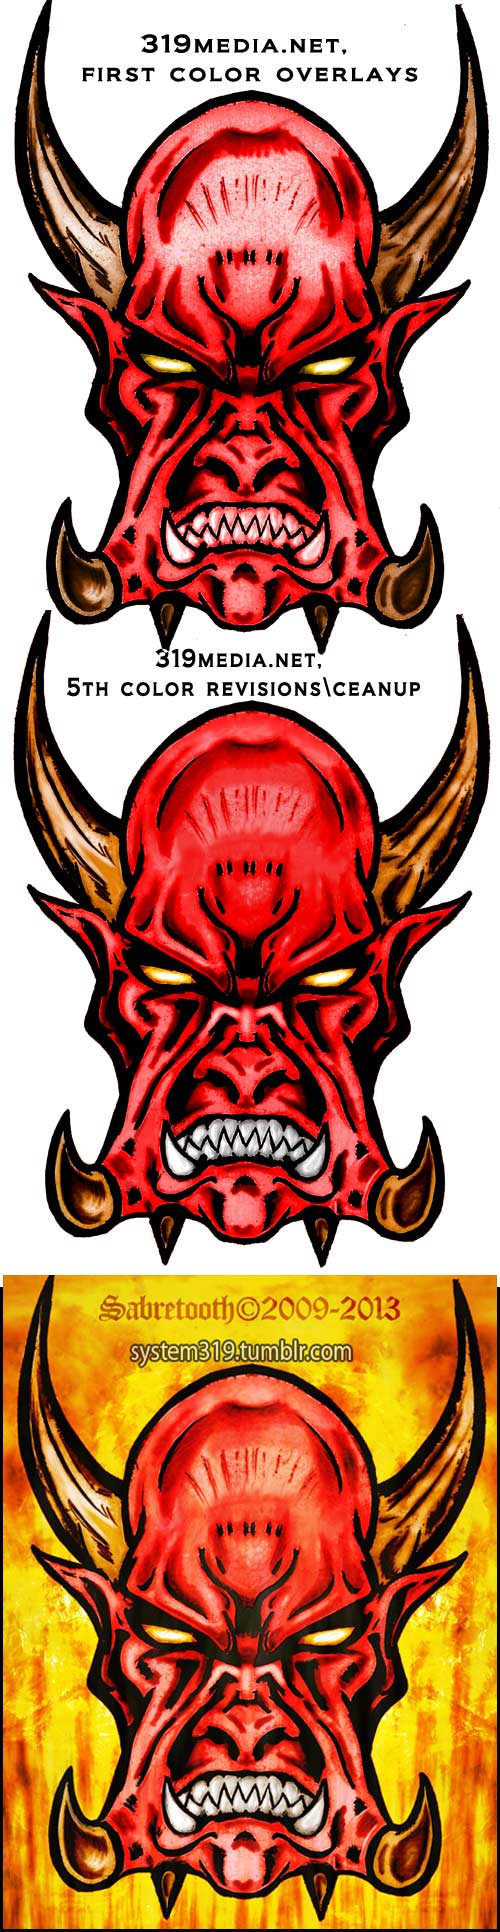
Color revisions and later on updated with a new background
As mentioned in the other image post, various color layers were added in different blending modes for differing color values. Some layers have other effects applied (like my favorite plastic wrap) to show texture, but are blended in a mode to make it subtle. The flesh, horns and eyes are each a color on their own layers, just flat color with a blending mode (maybe multiply, overlay, depending on the effect desired).
Like this? You can buy it on shirts and stickers on Redbubble